It has become a tradition every year that I make my boyfriend a birthday cake which he takes into work (after I've sneaked a slice for myself of course!)
The first year I made a chocolate on chocolate cake with fudge chunks, second year was the same but it didn't quite live up to the first year! This year I went for something a bit different, vanilla sponge with white chocolate icing and... marshmallows (not my idea, I wish I could take the credit!) Yes, marshmallows in the icing. I can't say they were planned, after making the sponge it just looked like the cake was going to be missing something, and I had to beat my first cake (I appear to be in competition with myself!) Cue a late night visit to the supermarket to look for something as good as fudge chunks, after staring at the cake section for a few minutes without much inspiration I let my boyfriend choose something. He chose mini marshmallows!
I've never seen marshmallows on a cake before and combined with the sugary sweet white chocolate I was a bit worried about causing some kind of sugar overload in the office. But it was seriously yummy, if I say so myself, and I'm not even a big fan of white chocolate. There was just something about the freshly baked soft sponge combined with the fluffy marshmallows that you couldn't beat!
The victoria sponge recipe is something my mum taught me when I was younger (she used to make it every week - minus the white chocolate and marshmallows) - it's the usual recipe with a few bits that have been added and tweaked over the years.
You will need:
6oz (150g) margarine - make sure its room temperature or warm
6oz (150g) castor sugar
3 eggs
6oz (150g) self raising flour (says sieved but I didn't and it was fine)
1 tsp baking powder (optional)
few drops of vanilla essence
For the butter icing: 4oz (100g) butter - make sure its room
temperature or warm
8oz (200g) icing sugar (again sieved)
100g white chocolate (any quantity would be
fine here - I experimented with 30p cooking
white chocolate instead of the £1.85
belgian chocolate option)
few drops of vanilla essence
tub of mini marshmallows
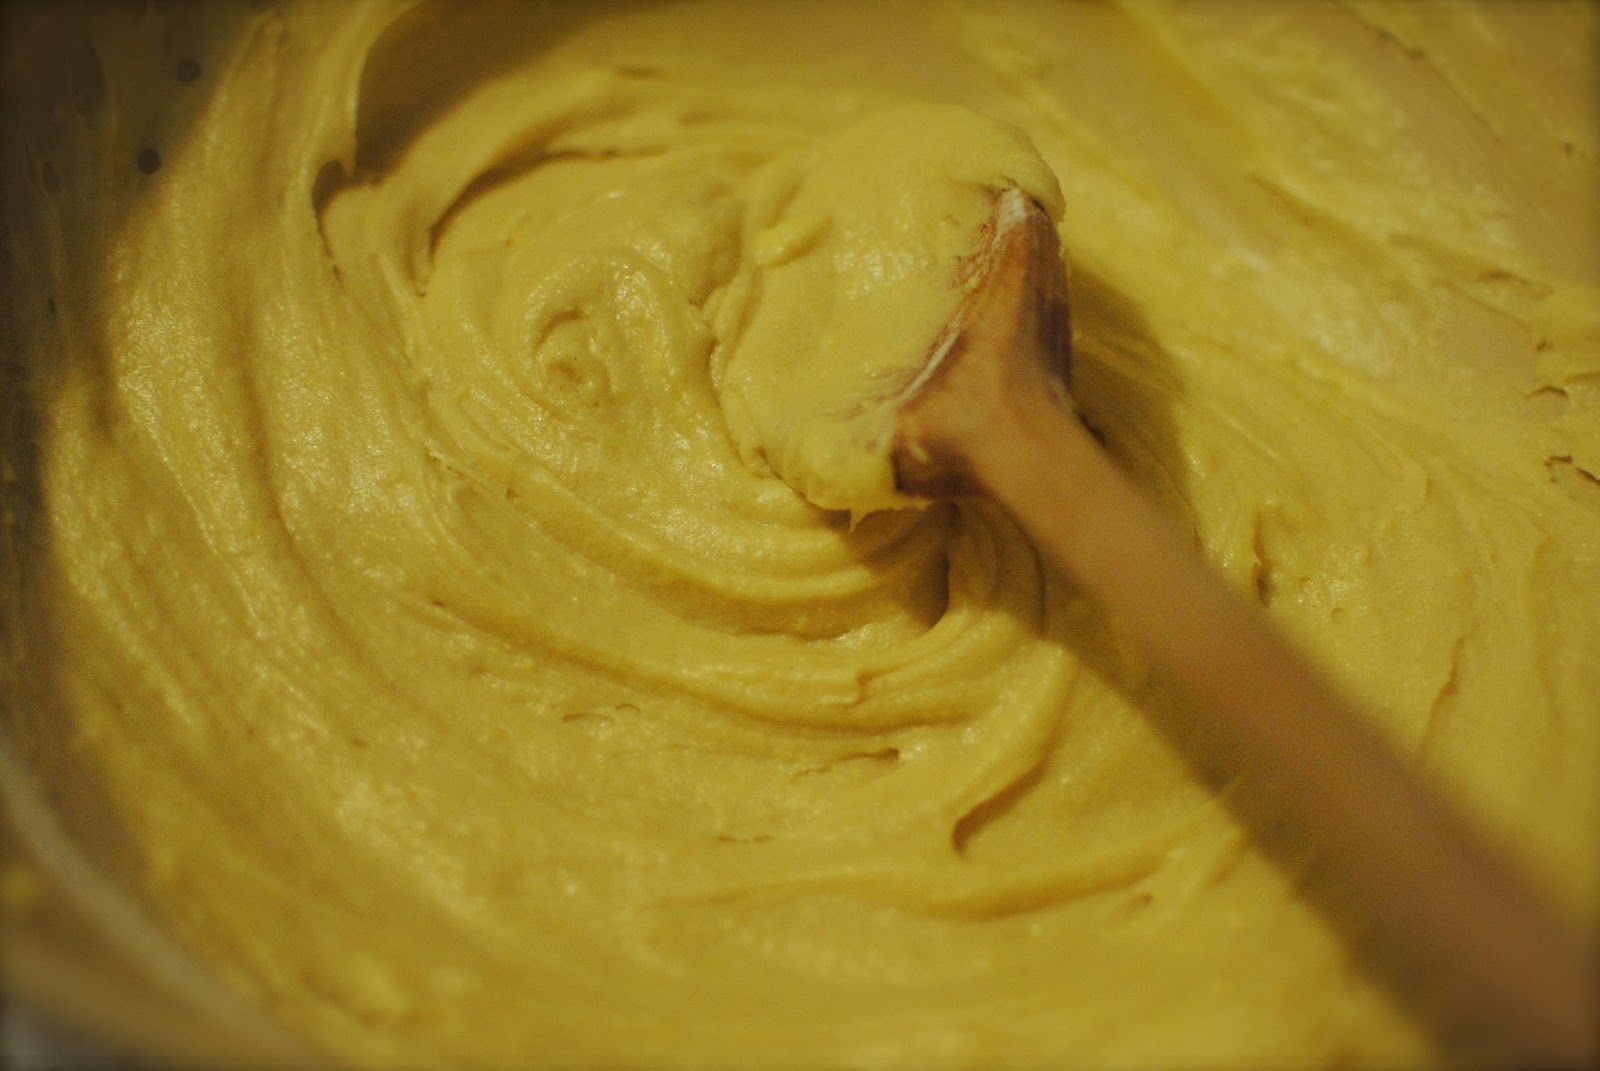
1. Mix the margarine and sugar with a wooden spoon until light and fluffy (it takes a while by hand)
2. Add the eggs one at a time beating to a smooth consistency between each addition (add a tablespoon of flour with the last egg)
3. Add the remaining flour, baking powder and vanilla essence - just long enough to incorporate the flour.
4. Bake in 2x7" sandwich tins, greased and lined, for 20-30 minutes at 190C.
5. Leave to cool on a wire rack.
6. Beat all the ingredients for the icing together until it is soft and fluffy.
7. Add the marshmallows and lightly mix in until they are incorporated into the icing.
8. Ice the cake - the way I've done it did make a lot of icing (it was quite hard to squeeze it all in the middle), you can halve the ingredients for the icing.
9. Sandwich the sponges together.
Any ideas for next year?
Maybe I'll be brave enough to try making real white cake, Django style!
Saturday, 18 January 2014
Tuesday, 31 December 2013
Recipe 52/13 - Mini Cheese and Chive Cakes
Its the time of year where party food is everywhere (and expensive) so I wanted to have a go at making my own! After flicking through a few recipe books for inspiration and only finding complicated extravagant looking options (I'd rather spend the time/ingredient money on making a whole meal or a pudding) I settled for some mini cheese and chive cakes in my go to book - '200 Cupcakes'. They looked quick, easy and all the ingredients needed where things I already had - perfect!
You will need:
200g self-raising flour
1 tsp baking powder
pinch of salt
50g mature cheddar cheese (finely grated)
4 tbsp snipped chives
50g lightly salted butter melted)
7 tbsp milk
1 egg (beaten)
Makes 20 (I halved the recipe and found it made 6 - luckily as I only have a 6 section non-mini muffin tray!)
1. Line 20 sections of 2 x 12 section mini muffin trays with mini paper cake cases.
2. Put the flour, baking powder and salt in a bowl.
3. Stir in the cheese and chives until evenly melted.
4. Whisk together the melted butter, milk and egg with a fork in a jug and add to the bowl.
5. Stir well to form a thick paste.
6. Divide the mixture between the paper cases.
7. Bake in a preheated oven - 200C for 10-12 minutes or until risen and pale golden.
8. Transfer to a wire rack.
9. Serve warm or cold.
I don't think I would serve these as party food to anyone! Mainly because they were huge... I didn't have any mini muffin trays meaning the results are just big cheese muffins, basically worse versions of cheese scones! They were a bit on the bready side in the middle - again this could be due to their size, and definitely could have done with more cheese as they didn't have much flavour.
I would love to know if cakes made with a mini muffin tray would be any better...
You will need:
200g self-raising flour
1 tsp baking powder
pinch of salt
50g mature cheddar cheese (finely grated)
4 tbsp snipped chives
50g lightly salted butter melted)
7 tbsp milk
1 egg (beaten)
Makes 20 (I halved the recipe and found it made 6 - luckily as I only have a 6 section non-mini muffin tray!)
1. Line 20 sections of 2 x 12 section mini muffin trays with mini paper cake cases.
2. Put the flour, baking powder and salt in a bowl.
3. Stir in the cheese and chives until evenly melted.
4. Whisk together the melted butter, milk and egg with a fork in a jug and add to the bowl.
5. Stir well to form a thick paste.
6. Divide the mixture between the paper cases.
7. Bake in a preheated oven - 200C for 10-12 minutes or until risen and pale golden.
8. Transfer to a wire rack.
9. Serve warm or cold.
I don't think I would serve these as party food to anyone! Mainly because they were huge... I didn't have any mini muffin trays meaning the results are just big cheese muffins, basically worse versions of cheese scones! They were a bit on the bready side in the middle - again this could be due to their size, and definitely could have done with more cheese as they didn't have much flavour.
I would love to know if cakes made with a mini muffin tray would be any better...
Wednesday, 18 December 2013
Recipe 52/12 - Homemade Pizza
This week I made an actual pizza from scratch! Yes even the dough... I don't have a recipe to share as the dough recipe was in a bread making manual and unless you have the exact same bread maker its not going to be very helpful!
Its all very easy apart from moulding the dough into the pizza base, the thinner the better. Kneading a ball of dough into a flat circle should be easy right? I couldn't get mine any bigger than a thick uneven rectangular shape (my boyfriend's one was an even thicker but much neater rectangle). Maybe I needed to throw it round in the air a bit like you see proper pizza makers do. Once you've got your pizza base its just a case of adding as many yummy toppings as possible (the best bit!)
You've got to be prepared time wise to make this though, after 40 minutes in the bread maker, 10 minutes struggling to make a pizza shape, 20 minutes rising, way too much time adding toppings and then 20 minutes baking you definitely have to plan ahead or get pretty hungry waiting (it was definitely worth the wait though!) It only actually requires 15-20 minutes of your actual time, the rest of the time its in the oven or bread maker.
So yes you can buy a pre made pizza, take it out its packet and leave it cooking for 15 minutes but this is so much tastier. The dough tastes so fresh and you don't have to be stingy with the toppings like bought ones usually are. You can buy 'empty' pizza bases to make your own pizza but they end up being a lot more expensive and whilst I did used to think these tasted good I don't think I would now I've had fresh.
If the base still tasted great when it was too thick (I thought it would ruin it and be all doughy) I bet if you could make one with a really thin base I bet it would taste amazing! Maybe next time! I definitely won't be buying a pizza again for a while...
Its all very easy apart from moulding the dough into the pizza base, the thinner the better. Kneading a ball of dough into a flat circle should be easy right? I couldn't get mine any bigger than a thick uneven rectangular shape (my boyfriend's one was an even thicker but much neater rectangle). Maybe I needed to throw it round in the air a bit like you see proper pizza makers do. Once you've got your pizza base its just a case of adding as many yummy toppings as possible (the best bit!)
You've got to be prepared time wise to make this though, after 40 minutes in the bread maker, 10 minutes struggling to make a pizza shape, 20 minutes rising, way too much time adding toppings and then 20 minutes baking you definitely have to plan ahead or get pretty hungry waiting (it was definitely worth the wait though!) It only actually requires 15-20 minutes of your actual time, the rest of the time its in the oven or bread maker.
So yes you can buy a pre made pizza, take it out its packet and leave it cooking for 15 minutes but this is so much tastier. The dough tastes so fresh and you don't have to be stingy with the toppings like bought ones usually are. You can buy 'empty' pizza bases to make your own pizza but they end up being a lot more expensive and whilst I did used to think these tasted good I don't think I would now I've had fresh.
If the base still tasted great when it was too thick (I thought it would ruin it and be all doughy) I bet if you could make one with a really thin base I bet it would taste amazing! Maybe next time! I definitely won't be buying a pizza again for a while...
Thursday, 5 December 2013
Recipe 52/11 - Salted Chocolate Tart
I thought I was one of those people who thinks savoury and sweet should never ever be mixed together (I still won't have Sweet and Sour chicken based on this principle!) Salt and chocolate - why oh why would you ever do that? I thought this until I was in Barcelona and I tried a Salted Caramel Chocolate pudding one night (at Lonja de Tapas - I became slightly obsessed with this Tapas restaurant) and it was one of the most delicious things I have ever eaten. Look I even have a photo of it - it was that good!
So when I stumbled across this recipe for Salted Chocolate Tart I was very happy (tart isn't quite the gooey pudding in the photo I know). The recipe even tells you to buy a ready made pastry case - not going to say no to that! It is super easy and quick to make, creates a tiny amount of washing up, you can make it in advance for something (it needs at least 4 hours in the fridge to set anyway) and it doesn't require any extravagant ingredients you will only use once. It was perfect for the week I had (I made it before I was trading at a four day Christmas Market and the thought of getting home for a slice definitely kept me going through the 10 hour days). But the best thing is for something that requires a small amount of work it was still one of the best things I have ever made! You can spend hours following some complicated baking recipe, spend another hour clearing up and the end result is quite good but probably better if you had just bought it - this seriously chocolatey tart tasted much better than some of those kind of recipes ever did.
You will need:
170ml double cream
2 tbsp whole milk (I just used normal semi-skimmed)
1/2 tsp vanilla extract
50g caster sugar
150g dark chocolate with sea salt (Lindt does one but I just used dark chocolate with a pinch of salt)
35g unsalted butter (cubed)
205g sweet pastry case
pinch sea salt to scatter (just try it!)
1. Warm the cream, milk, vanilla and sugar in a saucepan over a low heat, stir until the sugar has dissolved.
2. Bring to a simmer, take off the heat.
3. Stir in the chocolate and butter until melted.
4. Leave for 2 minutes.
5. Pour into the case.
6. Set in the fridge for at least 4 hours or overnight.
7. Scatter with sea salt just before serving with some creme fraiche on the side if liked.
It also says to try spreading the base with caramel before pouring over the chocolate (definitely trying this next time!)
You will need:
170ml double cream
2 tbsp whole milk (I just used normal semi-skimmed)
1/2 tsp vanilla extract
50g caster sugar
150g dark chocolate with sea salt (Lindt does one but I just used dark chocolate with a pinch of salt)
35g unsalted butter (cubed)
205g sweet pastry case
pinch sea salt to scatter (just try it!)
1. Warm the cream, milk, vanilla and sugar in a saucepan over a low heat, stir until the sugar has dissolved.
2. Bring to a simmer, take off the heat.
3. Stir in the chocolate and butter until melted.
4. Leave for 2 minutes.
5. Pour into the case.
6. Set in the fridge for at least 4 hours or overnight.
7. Scatter with sea salt just before serving with some creme fraiche on the side if liked.
It also says to try spreading the base with caramel before pouring over the chocolate (definitely trying this next time!)
Thursday, 21 November 2013
Recipe 52/10 - Cheese and Potato Nests
I delved into my favourite recipe book this week - The Little Paris Kitchen - Rachel Khoo. I couldn't resist this winter staple, especially now the temperature seems to have dropped about 1000 degrees! Whenever I've tried recipes in this book before they've gone a bit wrong and never look anything like the pictures (when does that ever happen anyway though?) but I'm determined to keep trying, something about the beautiful pictures and French food always draws me back in. I loved the idea of little tartiflette nests in a muffin tin too much not to try it.
I didn't have any reblochon cheese so I used Cheddar (very French I know!) and Gruyere instead, I also didn't use a bay leaf. Good start eh? I couldn't find a 'julienne' blade anywhere so I had to slice by hand. After slicing the potatoes to about chip size I couldn't take anymore, it would have taken me all night to get to matchstick size! Even if the potatoes had been the right size there was way too much to fit in 6 muffin holes, I had to fill a dish with the rest. I also stopped at about 200g of cheese as there seemed to be way too much. Maybe this is why my recipes don't turn out right, I don't actually follow them!
So as you can guess it didn't turn out like the picture. The potato slices were too big to form the compact nests and they needed a lot longer than 20 minutes to cook and at a higher temperature. The result was really yummy though, just more like a whole tartiflette, and if I can find a way to get the potatoes to matchstick size I will definitely try it again. Practice definitely makes perfect in this case!
You will need:
1 tbsp soft butter
500g waxy potatoes eg. Maris Peer or Charlotte
1 onion (finely chopped)
1 glove of garlic (finely chopped)
1 bay leaf
200g lardons or cubes of smoked bacon
100ml dry white wine
250g reblochon cheese (cubed)
1. Preheat the oven to 180C.
2. Brush a 6-hole muffin tin with soft butter.
3. Peel the potatoes and use the julienne blade on a mandoline to make thin matchsticks (or slice by hand).
4. Put the onion, garlic, bay leaf and lardons into a large non stick frying pan.
5. Cook until the lardons are golden.
6. Add the wine and reduce until only a couple of tablespoons of liquid remain.
7. Stir in the potato matchsticks and take off the heat.
8. Remove the bay leaf and stir in the Reblochon cubes.
9. Divide the potato mix between the 6 holes in the muffin tin and bake for 15-20 minutes or until golden and bubbling.
I didn't have any reblochon cheese so I used Cheddar (very French I know!) and Gruyere instead, I also didn't use a bay leaf. Good start eh? I couldn't find a 'julienne' blade anywhere so I had to slice by hand. After slicing the potatoes to about chip size I couldn't take anymore, it would have taken me all night to get to matchstick size! Even if the potatoes had been the right size there was way too much to fit in 6 muffin holes, I had to fill a dish with the rest. I also stopped at about 200g of cheese as there seemed to be way too much. Maybe this is why my recipes don't turn out right, I don't actually follow them!
You will need:
1 tbsp soft butter
500g waxy potatoes eg. Maris Peer or Charlotte
1 onion (finely chopped)
1 glove of garlic (finely chopped)
1 bay leaf
200g lardons or cubes of smoked bacon
100ml dry white wine
250g reblochon cheese (cubed)
1. Preheat the oven to 180C.
2. Brush a 6-hole muffin tin with soft butter.
3. Peel the potatoes and use the julienne blade on a mandoline to make thin matchsticks (or slice by hand).
4. Put the onion, garlic, bay leaf and lardons into a large non stick frying pan.
5. Cook until the lardons are golden.
6. Add the wine and reduce until only a couple of tablespoons of liquid remain.
7. Stir in the potato matchsticks and take off the heat.
8. Remove the bay leaf and stir in the Reblochon cubes.
9. Divide the potato mix between the 6 holes in the muffin tin and bake for 15-20 minutes or until golden and bubbling.
Saturday, 16 November 2013
Recipe 52/9 - Fried Mozzarella Sandwich
I was looking for a quick recipe this week (I think there may be a few more of these coming up with all the Christmas fair madness at this time of year) and this looked perfect for an indulgent lunch - like french toast with cheese. I love french toast and adding the mozzarella brings it out of breakfast territory, like I need an excuse to have french toast for two meals (or eggy bread as I used to call it when I was younger)!
This is an Italian recipe though (Mozzarella in Carrozza) so it has a few differences such as dipping the bread in milk and flour.
I think my hopes were too high for this as it wasn't as good as I was expecting, I guess mozzarella doesn't have much flavour. With cheddar instead and maybe some slices of tomato thrown in I think this would be better!
You will need:
about 4tbsp milk
4 thick slices country bread
2 large slices mozzarella
plain flour (to dust)
salt
3 eggs beaten (I only needed 1!)
olive oil (for shallow frying)
Serves 2
1. Pour the milk into a bowl.
2. Dip the slices of bread into the milk for a few seconds, but do not soak them - they don't want to be too wet.
3. Place a slice of mozzarella on two of the bread slices.
4. Place the other two slices of bread on top of the cheese to make the sandwiches.
5. Dip both sandwiches first into some flour seasoned with salt, then into the beaten eggs and leave for the mixture to be absorbed on both sides.
6. Pour enough oil into a frying pan to cover the base generously and heat gently.
7. Shallow-fry the sandwiches in the hot olive oil until golden, about 5 minutes per side.
8. Serve immediately.
This is an Italian recipe though (Mozzarella in Carrozza) so it has a few differences such as dipping the bread in milk and flour.
I think my hopes were too high for this as it wasn't as good as I was expecting, I guess mozzarella doesn't have much flavour. With cheddar instead and maybe some slices of tomato thrown in I think this would be better!
You will need:
about 4tbsp milk
4 thick slices country bread
2 large slices mozzarella
plain flour (to dust)
salt
3 eggs beaten (I only needed 1!)
olive oil (for shallow frying)
Serves 2
1. Pour the milk into a bowl.
2. Dip the slices of bread into the milk for a few seconds, but do not soak them - they don't want to be too wet.
3. Place a slice of mozzarella on two of the bread slices.
4. Place the other two slices of bread on top of the cheese to make the sandwiches.
5. Dip both sandwiches first into some flour seasoned with salt, then into the beaten eggs and leave for the mixture to be absorbed on both sides.
6. Pour enough oil into a frying pan to cover the base generously and heat gently.
7. Shallow-fry the sandwiches in the hot olive oil until golden, about 5 minutes per side.
8. Serve immediately.
Sunday, 10 November 2013
Recipe 52/8 - Chocolate Bourbons
I couldn't resist this recipe, who wouldn't want to make their own versions of the classic biscuit?
They were pretty fun and easy to make, a great weekend baking recipe! I gave up trying to make them all the same size, so I just made a variety of sizes. The recipe doesn't make very many (only 12 biscuits) so they might not be around for very long!
You will need:
60g unsalted butter
65g light brown soft sugar
110g plain flour
25g cocoa
2 tbsp double cream
1/4 tsp bicarbonate of soda
pinch of salt
granulated sugar
Filling:
25g unsalted butter
40g icing sugar
1/2 tbsp cocoa
1/2 tbsp double cream (I found it needed a bit more than this)
1. Preheat the oven to 170C
2. In a food processor, blitz unsalted butter, light brown soft sugar, plain flour, cocoa, double cream, bicarbonate of soda and salt.
3. Knead lightly to bring together.
4. Roll out to 0.5cm thick, cut into about 24 rectangles (5cm x 2.5cm).
5. Punch in the trademark indents with the base of a wooden skewer (I used a fork)
6. Sprinkle with granulated sugar.
7. Chill for 20 minutes.
8. Bake for 10 minutes, cool on a wire rack.
9. For the filling, beat together unsalted butter, icing sugar, cocoa and double cream.
10. Sandwich a little between two biscuits (makes 12).
They definitely look homemade and sadly don't taste as good as the real thing! The icing sugar in the filling makes them a bit more sickly, a creamier filling would be better. As biscuits though they are still yummy!
Subscribe to:
Posts (Atom)